Blog:
Windows Embedded Compact 的实时任务调度器
Windows Embedded Compact 同其他 Windows 操作系统之间关键的不同点在于它的实时调度器。这是一个在开发嵌入式系统时需要考虑的重要功能。在工程环境中,最好总是记住关于实时的定义,这就是为什么引用下面的我最喜欢的定义,出自 Phillip A. Laplante 所著的 《Real-Time System Design and Analysis》:
"A real-time system is a system that must satisfy explicit (bounded) response-time constraints or risk severe consequences, including failure."
- Real-Time System Design and Analysis (Phillip A. Laplante)
因此,一个实时系统执行代码,能够给出精确的结果,并且在固定时间范围内进行上述任务。否则,将会导致系统出现错误。实时并不是指快速处理的能力。
Windows Embedded Compact 能够符合上述的定义运行。那么,我们首先需要理解的是任务调度器是如何工作的? WinCE 遵循两个简单的规则调度任务。任务调度器每隔 1 ms 检查系统中存在的任务,根据下面的规则决定执行那个任务:
- 高优先级的任务需要首先执行。
- 相同优先级的任务需要在 100 ms 的时间分片(或者根据 Task Quantum 的定义)内轮转执行。
关于第一个规则,WinCE 具有 256 个优先级,较大的值代表更低的优先级,较小的是值代表更高的优先级。优先级使用说明可以在下面的文章中看到: Real-Time Priority System Levels (Windows Embedded CE 6.0).
关于第二条规则,当多个任务以相同的优先级执行时,系统将会把每个任务执行 100 ms(这个时间可以根据 Thread Quantum 设置)。一旦一个任务已经执行了特定的时间,内核将挂起这个任务,允许其他相同优先级的任务在特定的时间内运行(在 WinCE 中这个时间片称为 Quantum)。据此,如果在列队中有第三个相同优先级的任务,那么调度器将会挂起第二个任务,并执行第三个任务,直到所有相同优先级的任务都执行一次。一旦所有任务都被执行一个 quantum 的时间,那么调度器将会再一次启动第一个任务。一个线程只能运行一个 quantum 的时间,除非更高优先级的中断使用 CPU 资源。在这种情况下,线程被调度器提前清空。

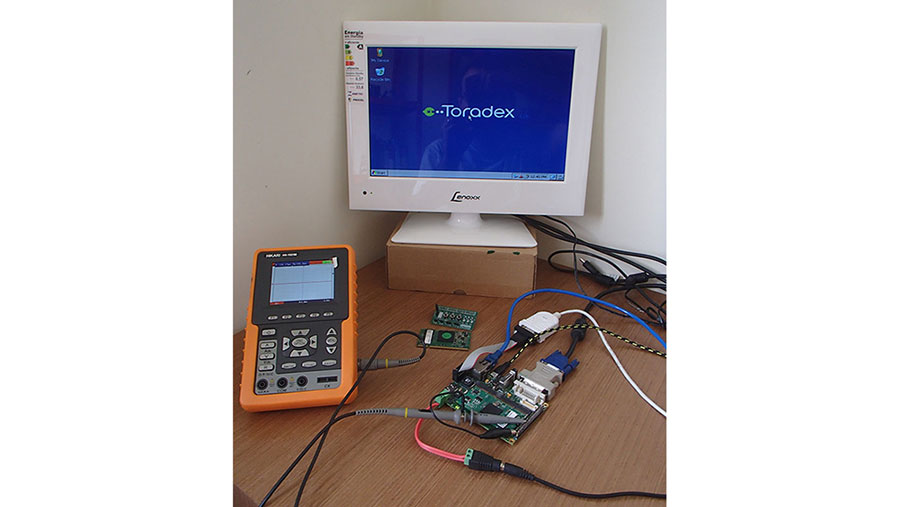
图片 1: Toradex Colibri VF61 Iris 模块和载板组成的计算机硬件
我将会使用两个例程来演示说明上述规则。第一个例程用于测试规则 2。我将会启动两个不同的任务,第一个会把模块的数字输出引脚设置为高电平,另外一个则将同一个输出设置为低电平。我将使用基于 NXP®/Freescale Vybrid 处理器的 Toradex Colibri VF61 256MB 系统模块,以及Iris Carrier Board(图 1)。Colibri VF61 处理器具有 500 MHz 主频的 Arm® Cortex™-A5 内核,配备 256 MB 内存和 512 MB Flash。操作系统采用由 Toradex 提供易于用户使用的 Windows Embedded Compact 6.0。WinCE 授权费用已经包含在售价中,很酷吧?以下是我写的代码。
/// @file         Gpio_Demo.c
/// @copyright    Copyright (c) 2014 Toradex AG
/// $Author: guilherme.fernandes $
/// $Revision: 2908 $
/// $Date: 2015-08-10 08:29:50 +0200 (Mo, 10 Aug 2015) $
/// @brief        Program to show how to use the Gpio Library
///
/// @target       Colibri VFxx,Txx,iMx Modules
/// @test         Tested on:  VFxx
/// @caveats      None

#include
#include "gpio.h"

// === define constant pins / gpios ===
uIo io1 = COLIBRI_PIN(101);
HANDLE hGpio;
HANDLE hThreadON, hThreadOFF;

DWORD WINAPI ThreadON (void){
	//Set Thread Priority
	CeSetThreadPriority(GetCurrentThread(), 100);
	Sleep(5); //Allow the other Thread to configure its PRIO
	//INFINITE LOCKING LOOP
	while ( 1 ){
		//Set GPIO logic high
		Gpio_SetLevel(hGpio, io1, ioHigh);
    }
    return 0;
}


DWORD WINAPI ThreadOFF (void){
	//Set Thread Priority
	CeSetThreadPriority(GetCurrentThread(), 100);
	//INFINITE LOCKING LOOP
	while ( 1 ){
		//Set GPIO logic low
		Gpio_SetLevel(hGpio, io1, ioLow);
    }
    return 0;
}


//=============================================================================
// Application Entry Point
//
// The simple error handling using ASSERT statements is only effective when
// the application is run as a debug version.
//=============================================================================
int wmain(int argc, _TCHAR* argv[])
{
    //HANDLE hGpio = NULL;            ///< handle to the GPIO library
    BOOL success;

    // === Initialize GPIO library. ===
    // We don't use registry-based  configuration, thus we can
    // pass NULL go Gpio_Init()
    hGpio = Gpio_Init(NULL);
    ASSERT(hGpio != 0);
    success = Gpio_Open(hGpio);
    ASSERT (success);

    // === Io Manipulation ===
    // Configure the pin to act as GPIO (as opposed to an Alternate function)
    // Set it to Output,  High
    Gpio_ConfigureAsGpio(hGpio, io1);
    Gpio_SetDir         (hGpio, io1, ioOutput);
    Gpio_SetLevel       (hGpio, io1, ioHigh);

	CeSetThreadPriority(GetCurrentThread(), 99);

	//Create two concorrent Threads, one set GPIO to High and other to Low
	hThreadON = CreateThread (0, 0, ThreadON, 0, 0, 0);
	hThreadOFF = CreateThread (0, 0, ThreadOFF, 0, 0, 0);

	//Time to finish the Program
	Sleep(3000);

    return(TRUE);
}
线程具有两个不同的入口函数:ThreadON 和 ThreadOFF。每个函数只包含将同一个 GPIO 引脚设置为高电平或者低电平的指令。另外需要说明的是,每一个函数都会在后台无限运行。因此,在使用其他线程或者程序时,请释放 CPU 资源。
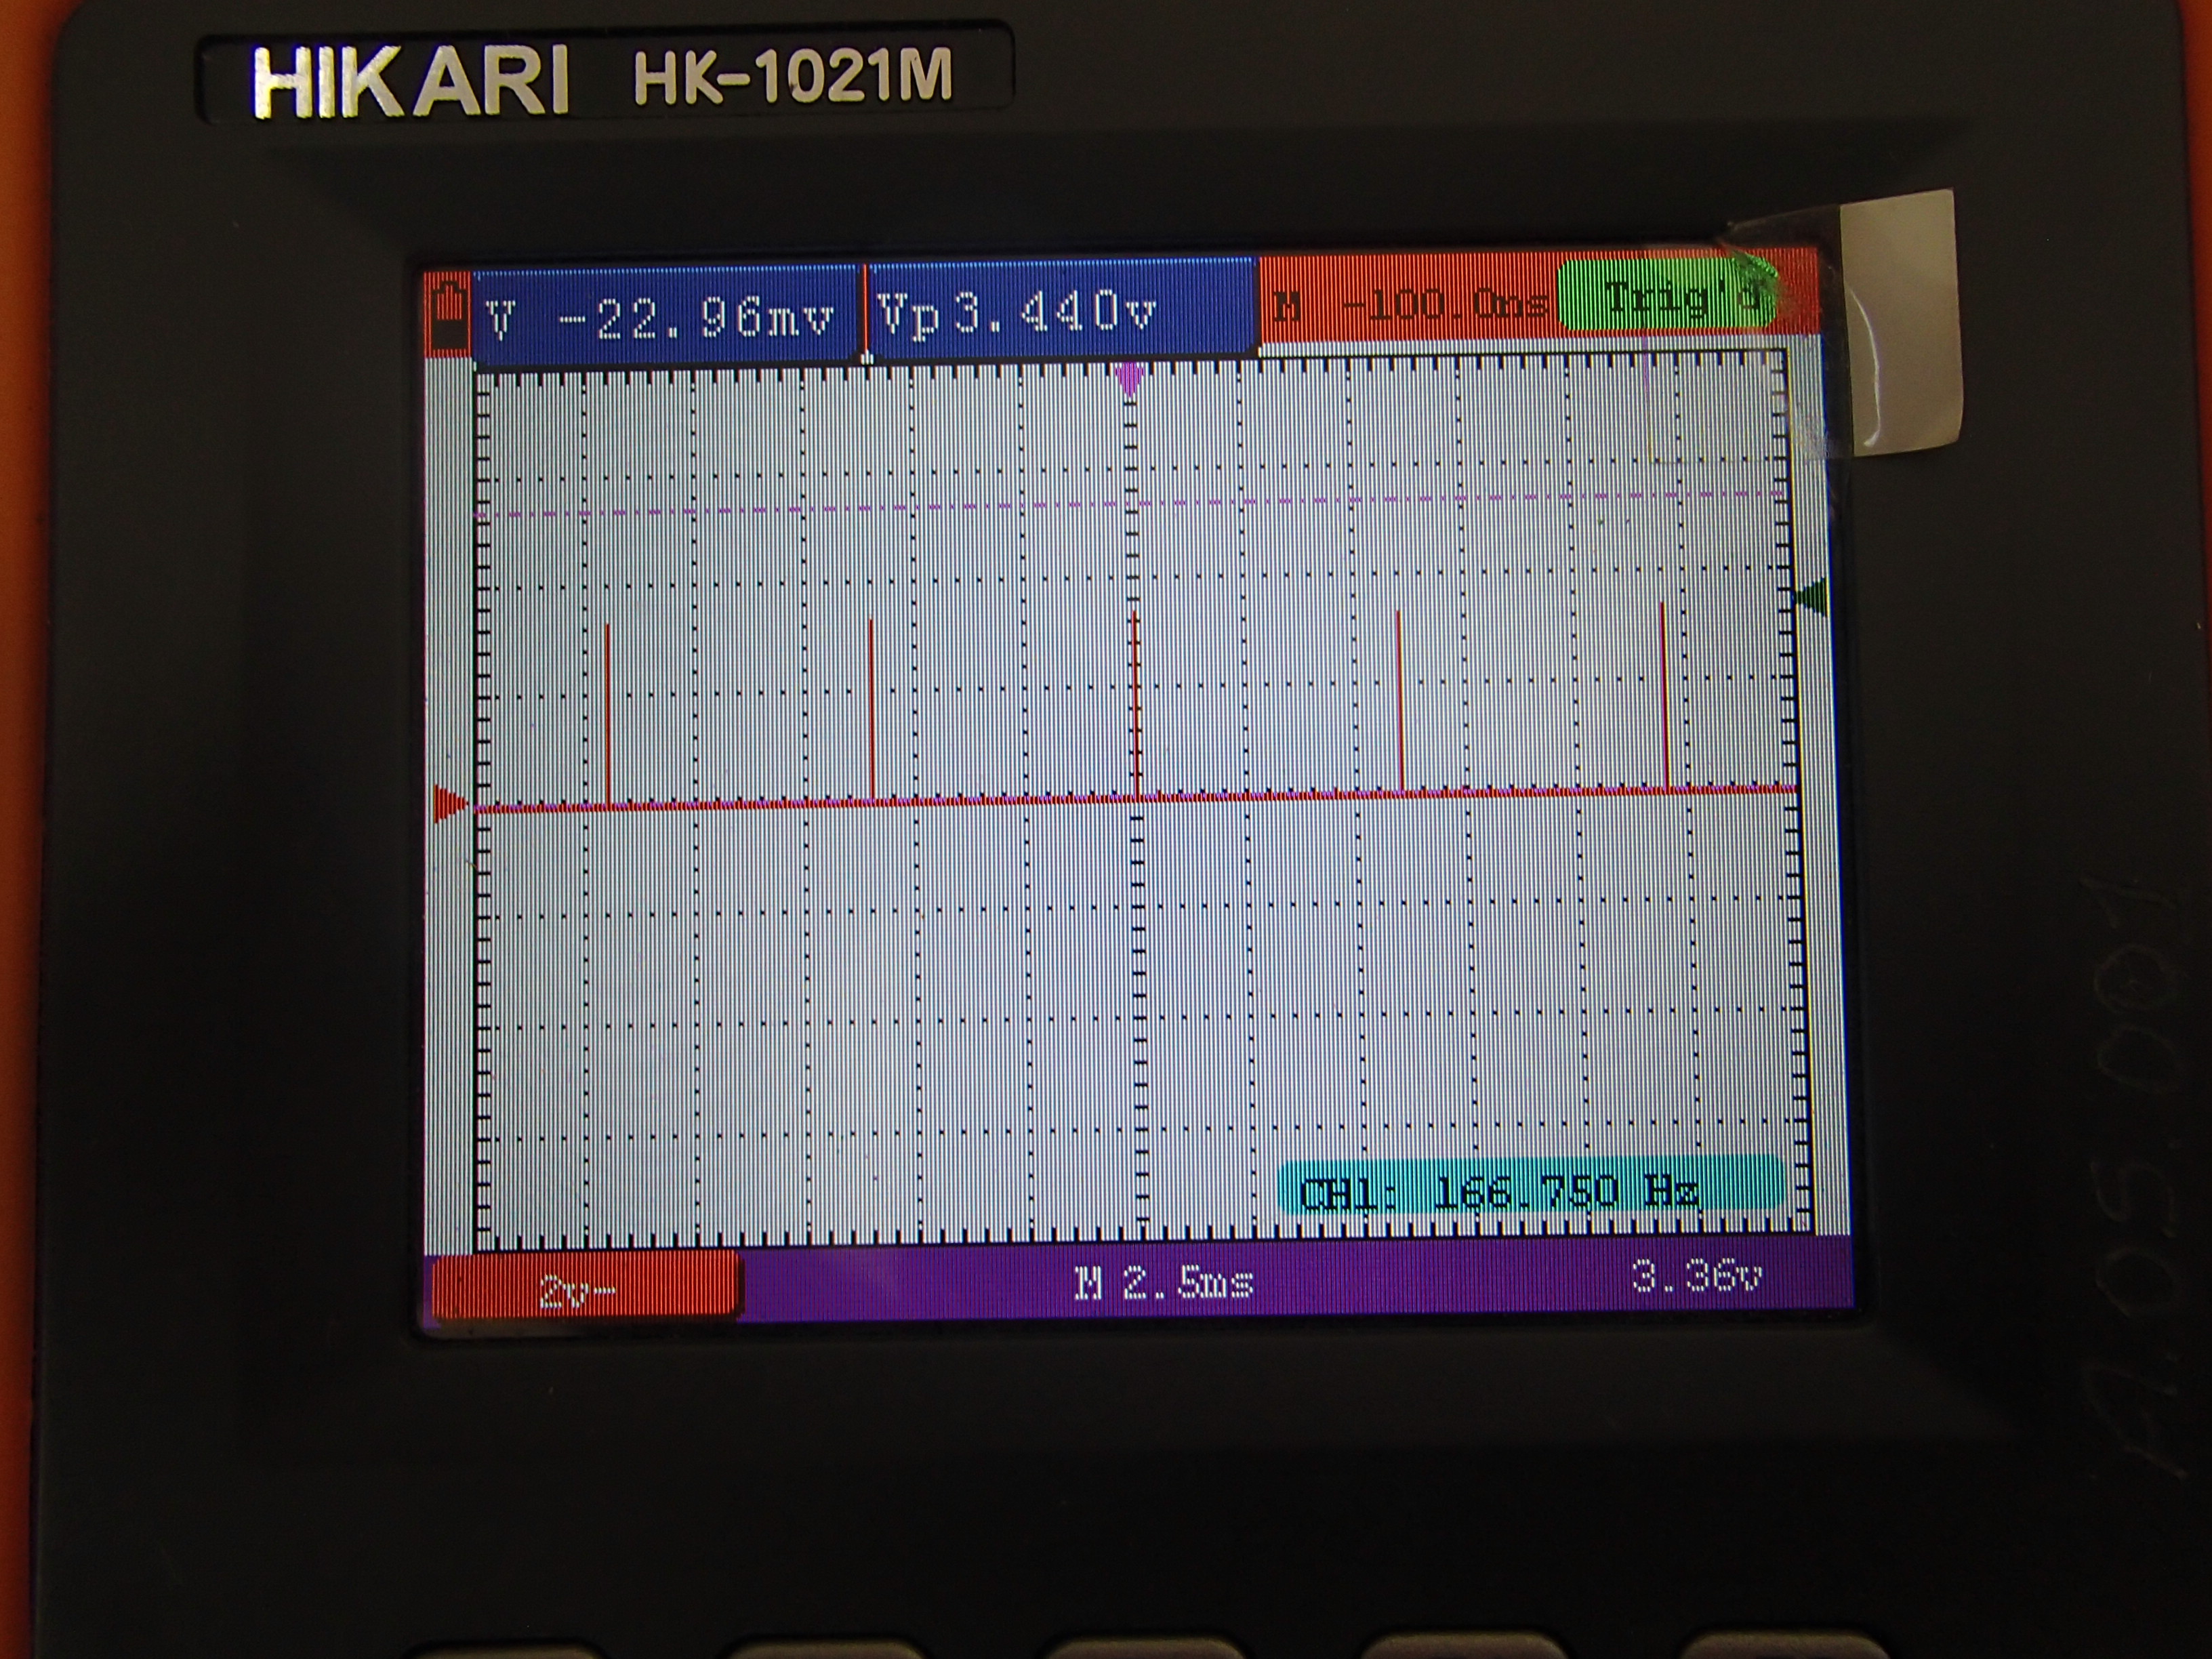
主函数开启线程,我们在图 2 中可以看到示波器测量的结果。正如我们预期的,只要任务具有相同的优先级,它们会根据轮询调度机制切换,每个任务在 100 ms 时间分片内运行。因此,这个简单的例程演示了规则 2 的实际效果。

图 2:运行两个相同优先级的线程,第一个引脚置高,第二个清零
为了测试规则 1,我们在代码里做如下修改。首先在 ThreadON 函数中添加 Sleep(5) ,使其自己挂起,并每隔 30 ms 发送请求给调度器恢复任务。
DWORD WINAPI ThreadON (void){
	//Set Thread Priority
	CeSetThreadPriority(GetCurrentThread(), 99);
Sleep(5); //Allow the other Thread to configure its PRIO
	//INFINITE LOCKING LOOP
	while ( 1 ){
		//Set GPIO logic high
		Gpio_SetLevel(hGpio, io1, ioHigh);
		Sleep(5);
    }
    return 0;
}
我同样提升 ThreadON 优先级从 100 到 99(黄色高亮部分)。
所以,ThreadON 具有比 ThreadOFF 更高的优先级。在以下示波器的图片中可以看到结果。每当高优先级线程被唤醒,内核都会停止低优先级线程,允许高优先的线程执行。

图 3:不同优先级线程。高优先级线程中断低优先级线程执行。
如果你使用多核系统,那么“Hands-up” 是一个重要的信号。WinCE 从 7.0 版本开始支持多核处理器。新的属性 affinity 可以配置哪一个内核执行线程。如果你使用 WinCE 7.0 在多核系统上,且不指定两个线程运行在同一个内核上,那么运行上面的例程的结果将出现不同,因为线程在不同的内核上运行。通常,设置 affinity 并不是一个好的方法,因为在不设置的情况下,我们能允许调度器在第一个可用内核上执行线程,从而缩短延时。
如今不少设备需要实时特性,包括工业自动化的嵌入式系统、机器人嵌入式系统或者嵌入式医疗设备上的应用。了解如何使用线程和 WinCE 调度器工作机制,使得你能够获得应用执行的确定结果,并使用 Windows Embedded Compact 开发实时系统。
- http://developer.toradex.com/knowledge-base/real-time-linux
- http://developer.toradex.com/knowledge-base/how-to-setup-development-environment-for-wince-and-vs2008
- http://developer.toradex.com/knowledge-base/create-a-new-vcpp-project
- http://developer.toradex.com/knowledge-base/how-to-use-gpio-library
本博文最初使用葡萄牙语在 Embarcados.com 发表,点击这里查看。